Small, targeted DIY projects can quietly transform your budget, trimming utility bills and boosting resale value far more than their modest price tags suggest. By focusing on fixes that cut wasted energy and highlight features buyers actually pay for, you can turn a weekend’s work into long‑term savings. Here are 15 practical upgrades that typically cost little, yet deliver outsized returns in comfort, efficiency and home value.
1) Swap Out Old Bulbs for LEDs
Swap out old bulbs for LEDs and you immediately attack one of the easiest sources of wasted electricity. Reporting on energy‑efficient lighting notes that this simple change can cut lighting costs by up to 75% annually because LEDs sip power instead of guzzling it. Separate guidance on DIY upgrades explains that Choosing LED light bulbs that use 90% less electricity can save you around $55 per bulb over its lifetime, a figure that turns a few dollars at the hardware store into a clear long‑term win.
Other coverage on utility savings reinforces that One of the easiest changes you can make is replacing your old incandescent light bulbs with energy‑efficient LEDs that consume up to 90% less power, so the math scales quickly across a whole house. Some experts even list using LED bulbs alongside replacing window gaskets and latching sash locks as “little resolutions” that save big over time. I see this as a textbook example of a DIY fix where the payback is so strong that not switching effectively leaves money on the table every month.
2) Insulate Your Attic on a Budget
Insulate your attic on a budget and you tackle one of the biggest sources of heat loss in a typical home. Reporting on energy‑efficient improvements points out that adding DIY insulation can prevent heat loss equivalent to leaving an open window, which is exactly how an under‑insulated attic behaves in winter. Separate advice on Affordable upgrades lists Insulating the attic or crawlspace alongside Weatherstripping and Caulking as low‑cost ways to cut energy use, underscoring that you do not need a full remodel to see measurable savings on your heating and cooling bills.
Because warm air rises, an attic with thin or patchy insulation lets conditioned air escape, forcing your furnace or air conditioner to run longer for the same comfort level. That wasted runtime shows up directly on your utility statement. By rolling out fiberglass batts or blowing in cellulose yourself, you can often reach recommended R‑values for a fraction of the cost of professional work. I view this as a high‑impact weekend project that quietly pays you back every season you live in the home.
3) Seal Drafts Around Windows
Seal drafts around windows and you stop invisible leaks that can waste up to 20% of a home’s energy use. Coverage of practical efficiency upgrades explains that using caulk and foam seals around window frames closes the gaps that let conditioned air slip outside. A separate fall‑prep video on simple upgrades that can save you hundreds on your energy bills highlights how a few minutes spent sealing up gaps around frames and trim can make rooms feel warmer without touching the thermostat, because you are no longer heating the outdoors.
Budget‑minded renovation guides group Caulking baseboards and cracks with other Affordable fixes, emphasizing that a tube of sealant is inexpensive yet dramatically improves the performance of existing windows. I find the stakes especially clear for older homes, where wood frames may have shrunk or shifted over time. By methodically running a bead of caulk along interior trim and adding rope caulk or foam tape where sashes meet, you reduce drafts, cut noise and extend the useful life of windows you already own instead of rushing into a costly replacement project.
4) Install a Smart Thermostat
Install a smart thermostat and you give your HVAC system a brain that can save 10% or more on heating and cooling costs each year. Reporting on energy‑efficient home improvements notes that this DIY device optimizes temperatures automatically, dialing back when you are asleep or away and warming or cooling the house again before you return. Separate guidance on green upgrades urges homeowners to Add a smart thermostat like Nest or Ecobee, explaining that the Cost of the unit is typically recouped through lower utility bills, often within just a few seasons of normal use.
Step‑by‑step installation advice shows how to Upgrade your home heating with a smart thermostat and Learn what tools you need, reinforcing that many models are designed for confident DIYers rather than specialists. Another expert breakdown on Selecting the right thermostat stresses that choosing a model compatible with your system is crucial for unlocking those savings. In my view, this is one of the rare tech gadgets that meaningfully changes your monthly expenses, because it quietly enforces the energy‑saving habits most of us intend to follow but forget in daily life.
5) Add Low-Flow Showerheads
Add low‑flow showerheads and you cut both water and energy use every time someone turns on the tap. Reporting on energy‑efficient upgrades explains that replacing old fixtures with modern low‑flow models conserves gallons per shower without sacrificing pressure, which directly reduces the amount of hot water your heater must produce. A separate guide on how to Install low‑flow showerheads and faucets notes that you can Save water and energy in less than an hour, framing this as a quick project with an immediate impact on utility bills.
Hands‑on demonstrations, such as a DIY Energy Savings Toolkit video that begins with “Today we’re going to be switching out an old shower head for a more water efficient shower head,” show that the process usually involves nothing more than an adjustable wrench and plumber’s tape. I see the broader stakes in regions facing water stress, where cutting consumption is not just about personal savings but also about easing demand on local infrastructure. Over a year, a family’s daily showers can translate into hundreds of gallons saved and a noticeable drop in energy costs.
6) Apply Weatherstripping to Doors
Apply weatherstripping to doors and you close the often‑overlooked gaps that let cold air pour into your home. Energy‑efficiency reporting notes that this quick fix blocks drafts and can lower energy bills by sealing the spaces around door jambs and thresholds that otherwise act like tiny open windows. Guides to Affordable home improvements list Weatherstripping doors and windows alongside other low‑cost measures, emphasizing that a few adhesive strips or a new door sweep can dramatically improve comfort in rooms that always seem chilly or hot.
Fall‑prep advice from home‑improvement specialists shows how a few minutes of work sealing up gaps can save you hundreds on your energy bills, and doors are a prime target in that strategy. I find that the stakes are especially high in older houses where exterior doors may have warped or settled, leaving uneven gaps that you can feel with a simple hand test on a windy day. By installing foam, rubber or brush‑style weatherstripping, you reduce drafts, cut noise and help your heating and cooling systems maintain a steady temperature with less effort.
7) Wrap Hot Water Pipes
Wrap hot water pipes and you keep heat where it belongs, inside the water instead of bleeding into unfinished spaces. Reporting on energy‑efficient home improvements explains that insulating pipes maintains hot water temperature and can reduce reheating energy by up to 5–10%, because your water heater does not need to cycle as often. Practical DIY guides on efficiency upgrades also encourage homeowners to Replace bare runs of pipe in basements or crawlspaces with insulated ones, noting that this is a straightforward project using pre‑slit foam sleeves or fiberglass wrap.
Beyond the direct savings, insulated pipes deliver hot water to taps and showers faster, which means you waste less water waiting for it to warm up. That time savings adds up in busy households where multiple people shower or wash dishes daily. I see this as a particularly smart fix in colder climates, where uninsulated pipes can lose heat quickly and are more vulnerable to freezing. For the cost of a few lengths of insulation and tape, you gain efficiency, comfort and a bit of extra protection against winter damage.
8) Mount Ceiling Fans Strategically
Mount ceiling fans strategically and you can run your air conditioner less while staying just as comfortable. Energy‑saving coverage notes that proper fan installation circulates air so you can set thermostats higher in summer, trimming cooling costs without feeling warmer. When fans push air downward in a gentle breeze, the wind‑chill effect makes a room feel several degrees cooler, even though the actual temperature has not changed, which is why efficiency experts consistently recommend pairing fans with moderate thermostat settings.
In winter, reversing the fan direction to pull air upward helps redistribute warm air that collects near the ceiling, reducing cold spots and easing the load on your furnace. I view this as a classic example of using simple physics to stretch the value of every kilowatt you buy. Because ceiling fans draw far less power than central air systems, the net savings can be significant over a long cooling season, especially in larger homes where a few well‑placed fans keep frequently used rooms comfortable without over‑conditioning the entire house.
9) Upgrade to Efficient Window Treatments
Upgrade to efficient window treatments and you turn glass into a more effective thermal barrier. Reporting on energy‑efficient home improvements explains that DIY shades or reflective films can block solar heat and decrease cooling costs by reflecting sunlight before it warms interior surfaces. That same coverage notes that well‑chosen window coverings help keep heat inside during winter nights, reducing the burden on your heating system and smoothing out temperature swings that make rooms uncomfortable.
Budget‑friendly upgrade guides often highlight cellular shades, insulated curtains and reflective films as cost‑effective alternatives to full window replacement, which can be expensive and slow to pay off. I see the stakes rising as summers grow hotter in many regions, making solar gain a bigger share of cooling loads. By combining efficient window treatments with basic sealing and weatherstripping, you create a layered defense against heat transfer that improves comfort, protects furnishings from UV damage and trims utility bills without altering the structure of your home.
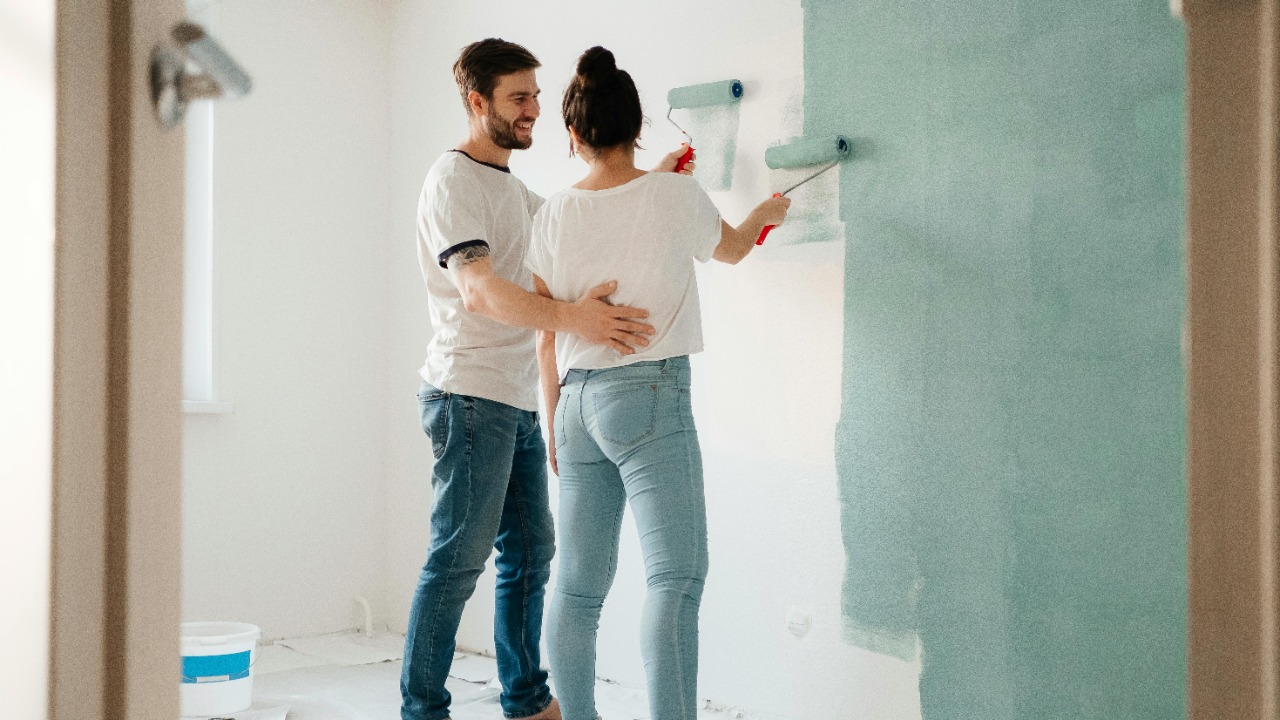
10) Refresh Interior Paint
Refresh interior paint and you can recoup nearly every dollar you spend when it is time to sell. Reporting on top home updates that pay off finds that a fresh coat in neutral, light‑reflecting colors boosts appeal and resale value, often recouping 100% of costs through faster sales and stronger offers. Guidance on which projects deliver returns highlights how updated walls make a space feel cleaner and more modern, signaling to buyers that the home has been well maintained even if other finishes are older.
At the same time, experts warn in separate coverage of home upgrades that are a waste of money that overly personalized or trendy finishes can backfire, forcing buyers to mentally budget for repainting. I interpret that contrast as a reminder to choose timeless palettes rather than bold experiments when you are thinking about resale. With basic tools and some patience, DIY painting remains one of the most accessible ways to transform rooms, brighten dark corners and create a cohesive look that supports a higher asking price.
11) Update Cabinet Hardware
Update cabinet hardware and you can give a tired kitchen or bath a surprisingly modern look without touching the cabinets themselves. Reporting on home updates that pay off notes that simple swaps of knobs and pulls can add perceived value that offsets expenses, because buyers often react to the overall impression of a room rather than tallying individual components. When hardware matches current styles and finishes, older cabinets read as intentional and cared‑for instead of dated.
Renovation experts frequently contrast this kind of light‑touch refresh with full kitchen remodels that may not recoup their costs, especially if they involve moving walls or utilities. I see hardware changes as a strategic middle ground, particularly in starter homes or rentals where budgets are tight. With a drill, a template and a few hours, you can replace worn brass or mismatched pieces with cohesive black, brushed nickel or brass hardware that aligns with what buyers see in new construction, nudging your space closer to their expectations.
12) Refinish Existing Floors
Refinish existing floors and you unlock value that is already hiding underfoot. Reporting on high‑ROI home updates explains that sanding and sealing hardwood can revive a space, delivering a fresh, high‑end look without the cost of full replacement. Because new flooring materials and labor are expensive, bringing original wood back to life often yields a stronger return, especially in older homes where solid planks are a selling point that many buyers actively seek out.
Real‑estate guidance also notes that buyers frequently prioritize move‑in‑ready floors, ranking them alongside paint and kitchens as key decision factors. I view refinishing as a smart DIY or semi‑DIY project for experienced homeowners who are comfortable renting sanders and working carefully, though many people will still hire out the heaviest steps. Either way, the economics are compelling: by preserving what you have and choosing durable finishes, you extend the life of your floors, reduce waste and position your home more competitively in a crowded market.
13) Enhance Curb Appeal with Landscaping
Enhance curb appeal with landscaping and you influence buyers before they even step inside. Reporting on home updates that pay off highlights how DIY planting, edging and mulching can increase perceived property worth by creating strong first impressions that attract more showings. Simple steps like defining flower beds, trimming overgrown shrubs and adding seasonal color near the entryway help a home photograph better and feel more welcoming during drive‑bys and open houses.
Budget‑friendly improvement guides emphasize that you do not need elaborate designs to see results, especially when you focus on clean lines, healthy grass and low‑maintenance plants suited to your climate. I see landscaping as a compounding investment: it improves daily enjoyment while you live in the home and then pays off again at sale time. Because many buyers associate tidy yards with responsible ownership, a well‑kept exterior can subtly reassure them about the condition of the systems they cannot see, from the roof to the foundation.
14) Install New Light Fixtures
Install new light fixtures and you can transform the mood of a room in a single afternoon. Reporting on top home updates explains that swapping outdated fixtures for modern, well‑scaled options brightens spaces and elevates style, helping sellers recoup their investment through improved marketability. Good lighting also showcases other upgrades, from fresh paint to refinished floors, making photos pop in online listings where buyers form their first impressions.
At the same time, experts caution that some elaborate or overly customized fixtures can veer into the territory of upgrades that are a poor use of money, especially if they are hard to maintain or out of step with the rest of the house. I interpret that as a nudge toward simple, timeless designs in finishes that match existing hardware. With basic electrical knowledge and the power safely off, many homeowners can handle fixture swaps themselves, turning a modest purchase into a noticeable boost in perceived quality.
15) Add Open Shelving
Add open shelving and you tap into a feature that many of today’s buyers actively seek. Reporting on home features that add value notes that this storage solution modernizes kitchens and can speed up a sale by showcasing dishes and glassware while minimizing the need for full cabinet build‑outs. Because open shelves use less material and labor than closed boxes, they offer a budget‑friendly way to expand storage and visual interest at the same time.
Design‑focused coverage also points out that open shelving pairs well with other low‑cost refreshes, such as updated hardware and fresh paint, to create a cohesive, contemporary look. I see the broader stakes in how buyers evaluate kitchens: they often prioritize layout, light and storage over expensive finishes. By installing sturdy brackets into studs and using simple wood or metal shelves, you can reconfigure a blank wall or replace a few upper cabinets, giving your kitchen a more custom feel while keeping costs firmly in DIY territory.
More From TheDailyOverview
- Dave Ramsey says these two simple questions show whether you’re rich or poor
- Retired But Want To Work? Try These 18 Jobs for Seniors That Pay Weekly
- IRS raises capital gains thresholds for 2026 and what’s new
- 12 ways to make $5,000 fast that actually work

Cole Whitaker focuses on the fundamentals of money management, helping readers make smarter decisions around income, spending, saving, and long-term financial stability. His writing emphasizes clarity, discipline, and practical systems that work in real life. At The Daily Overview, Cole breaks down personal finance topics into straightforward guidance readers can apply immediately.